For another one of my classes, ANTH 392: Paleolithic Art, I am currently working on a term project on spit painting. This is the method used at Pech Merel in the Quercy region of France to create the famous spotted horses dating 250,000 BCE.
For this project a friend and I are attempting to learn how to spit paint. It is surprisingly hard. To create this effect you have to chew up, or grind, charcoal which then you put in your mouth and spit on the wall. You have to be careful otherwise you will end up with huge globs instead of the fine spray that is desired...
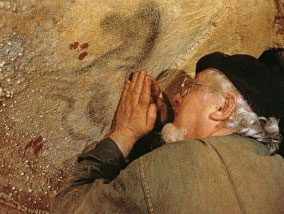 |
| Lorblanchet's beautiful horse.... |
 |
| My Pathetic first attempt... waaaay too much saliva! Although the top bit is okay... |
For this project I am using "Art- Arch Charcoal" which is made of burned rods that vary from stick to stick, some of them are a lot harder to chew but it is the safest choice health wise.
So basically you chew up the stick and then, while trying to keep your mouth as dry as possible you spit it onto the wall. We tried this in class during a lab as well, on paper, and it turned out really soggy!
Using my hand as a stencil I was able to make the first hand with one stick of charcoal. As you can see from the picture, there were a lot of globs the first go. The second one I chewed the charcoal more at the front of my mouth using my incisors in stead of my molars, that worked a lot better. Also, I tried using my tongue as a stopper more in the second one.
 |
| Much better! |
The advantages to spit painting is that no matter how rough the surface you are working with, such as cave walls, the paint will still reach all the crevices. Using a brush is harder because you have to dab in order to get the sharp dark lines achieved in the Pech Merle picture.
This method is not just limited to France though, or even to the Paleolithic. There is still a group of people who practice this art form today! The Aborigines of Australia use it to create hand marks as well.
Lovely!
I will ad to this blog after I have experimented some more. Tomorrow I plan to try some lines using my hands to channel the paint!

Me and my hand, yummy yummy.
I'm thinking you should go and try it on some actual rocks around Victoria. It could be part of our "fake" archaeological site!
ReplyDeleteHaha, I was thinking of finding some where on campus. I even was scoping out some of the buildings... I mean no I wasn't. Could we do a collaborative blog on a made up site if we have time? that would be hilarious!
DeleteThis comment has been removed by the author.
DeleteVery cool!! I've tried this before just for fun; but my hand print came out really splotchy and uneven. I couldn't seem to get it as smooth (and not near as awesome looking) as your second one. Any other good tricks you could share?
ReplyDeleteI found that keeping the charcoal at the front of your mouth and a bit dryer than you would think is the best. Also it takes a little while, think of spraying on less. I also used my tongue to stop the flow and control how much spray was produced at a time. Is that at all helpful?
ReplyDeleteYes! I had some free time over the weekend and got my handprint to turn out much better with your tips. Hardest part was keeping the charcoal somewhat dry on my tongue. I was thinking maybe holding part of it in the cheek might work better. Any suggestion on what works best for you? If you happen to make any more paintings, it'd be awesome to see them. Thanks again for sharing your tricks!!
Delete